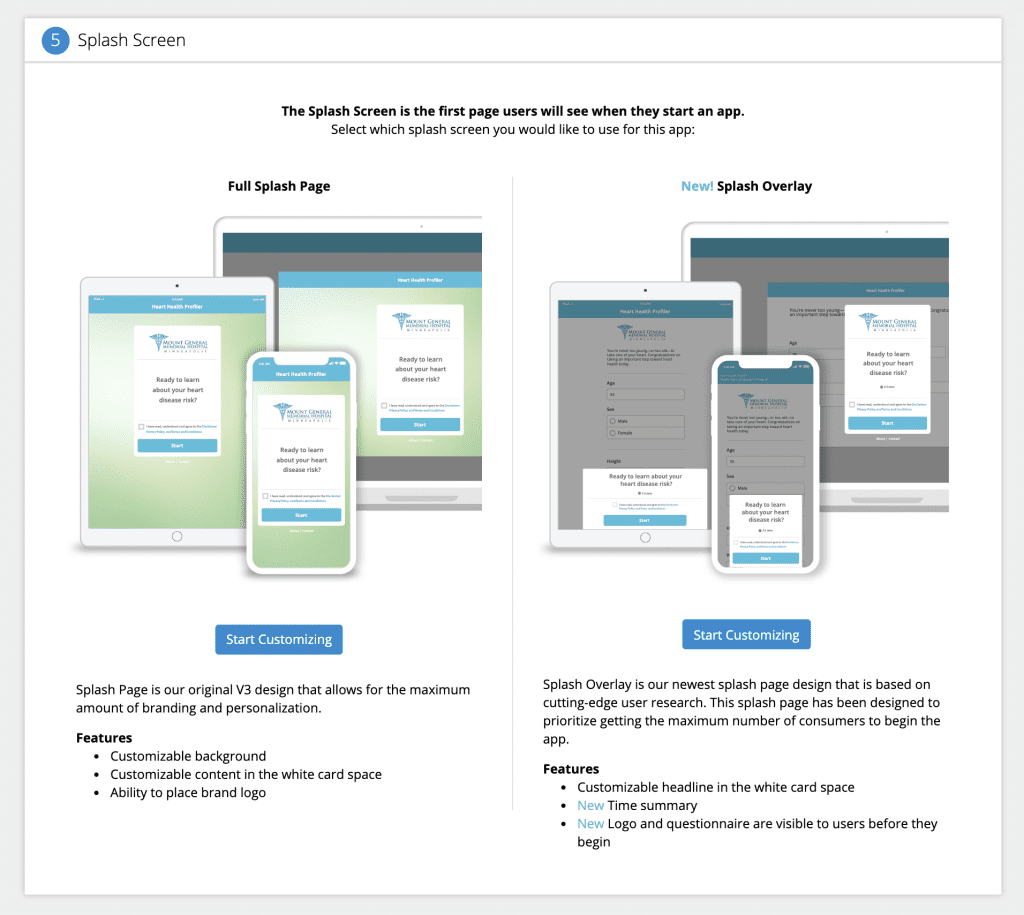
Our Health Assessments have multiple options when it comes to Splash Screens. The full-page design is highly customizable and incredibly flexible, making it optimized for both mobile and desktop devices. A Splash Overlay design streamlines the user experience to capture and engage users from start to finish.
Start by choosing your Splash Screen template. Click the Start Customizing button under the template you wish to use.
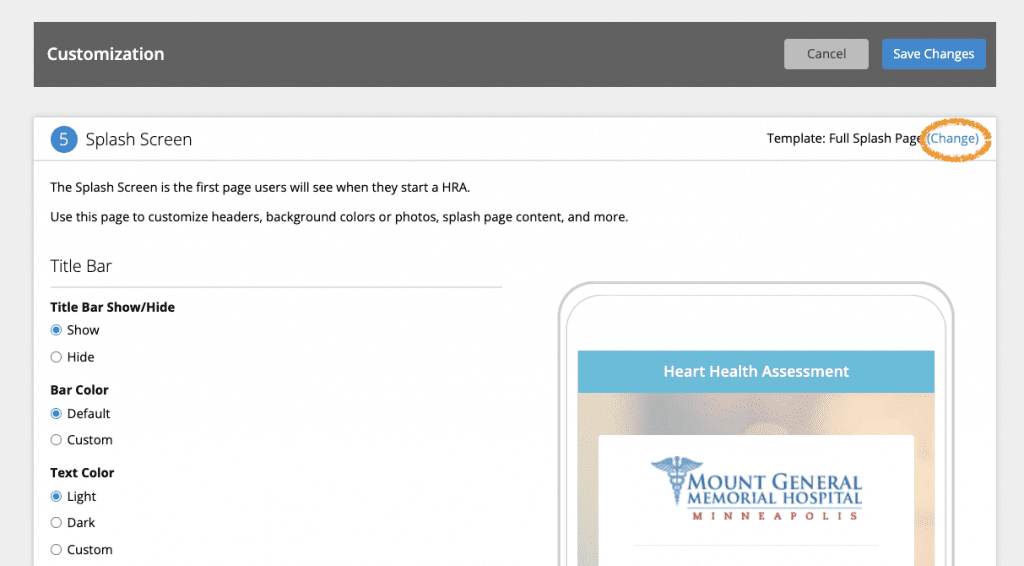
If you ever want to change your template type, simply click the Change link in the upper right corner of each template customization page.
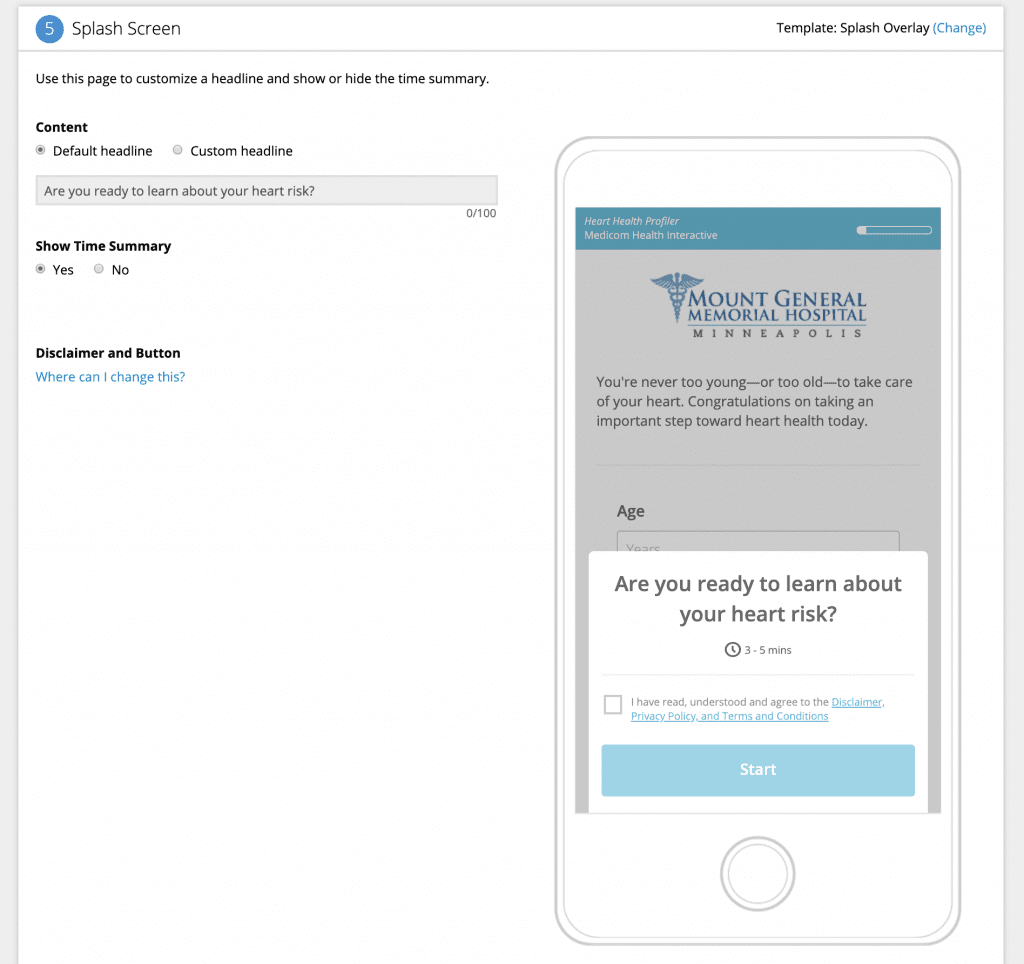
To customize the Splash Overlay version:
First, choose a default or a custom headline for your Splash overlay. This is the text that will appear on the card.
You can also choose to display a time summary on your overlay, indicating to users their total time investment to complete the HRA.
The full disclaimer is still accessible by clicking the link next to the disclaimer acceptance checkbox.
When finished, click the Save Changes button. Next, click Publish to make your changes live.
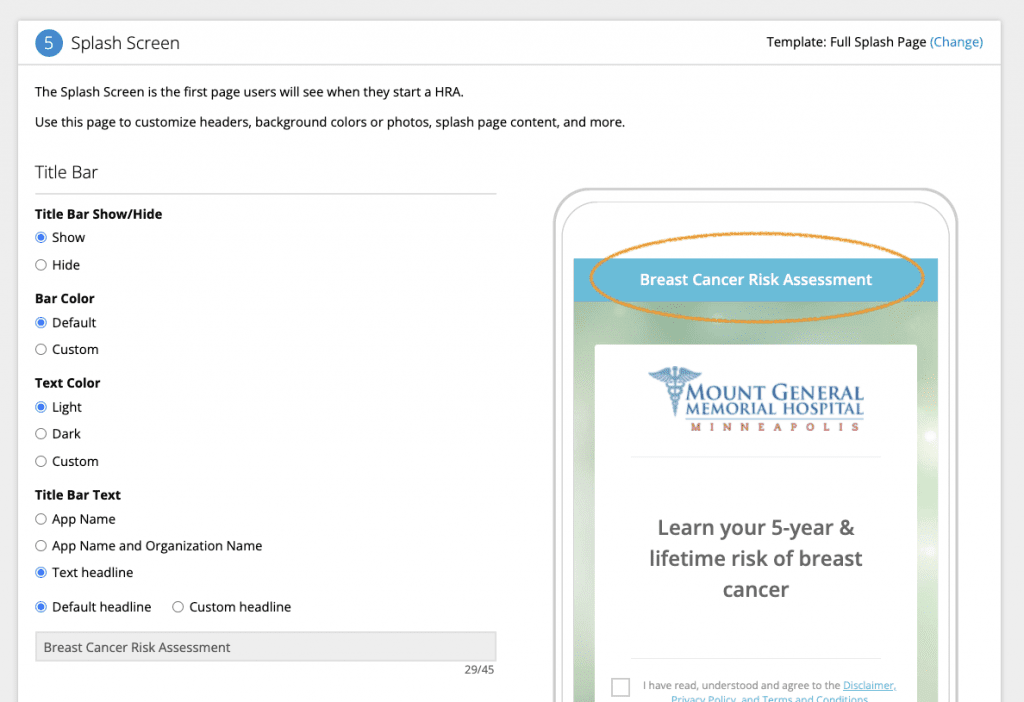
To customize the Full Splash Page version:
The Full Splash Page has multiple customization options to create a one-of-a-kind Splash Screen for your HRAs. As you make your selections, the sample image updates to display how your Splash Screen will appear. You can also click the Preview button on the main Customization page to see your saved changes.
Title Bar
In this section you can choose to show or hide the title bar, change the bar color, the text color and the text headline that is shown (usually the name of the application).
Note: Throughout the form, the Default color is the Primary Interface Color selected in the Branding, Logos and Color section of Customization. Custom colors can be added by entering the color hex code for each element (for example: #FF0000 is red).
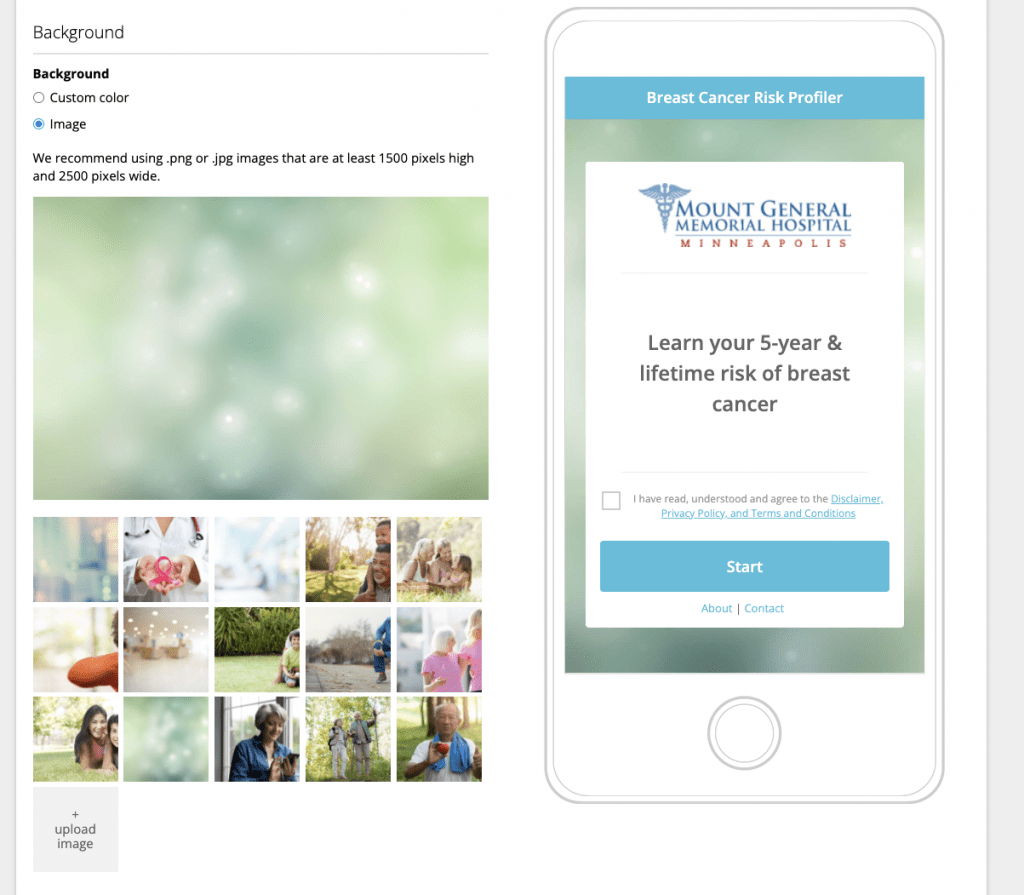
Background
We’ve provided built-in background images available for you to use on your HRA Splash Screens. You can also upload a custom background image or add a custom background color to enhance the look and feel of your HRA. Double-click any image tile you want to use or the + upload image tile to add your own.
Card
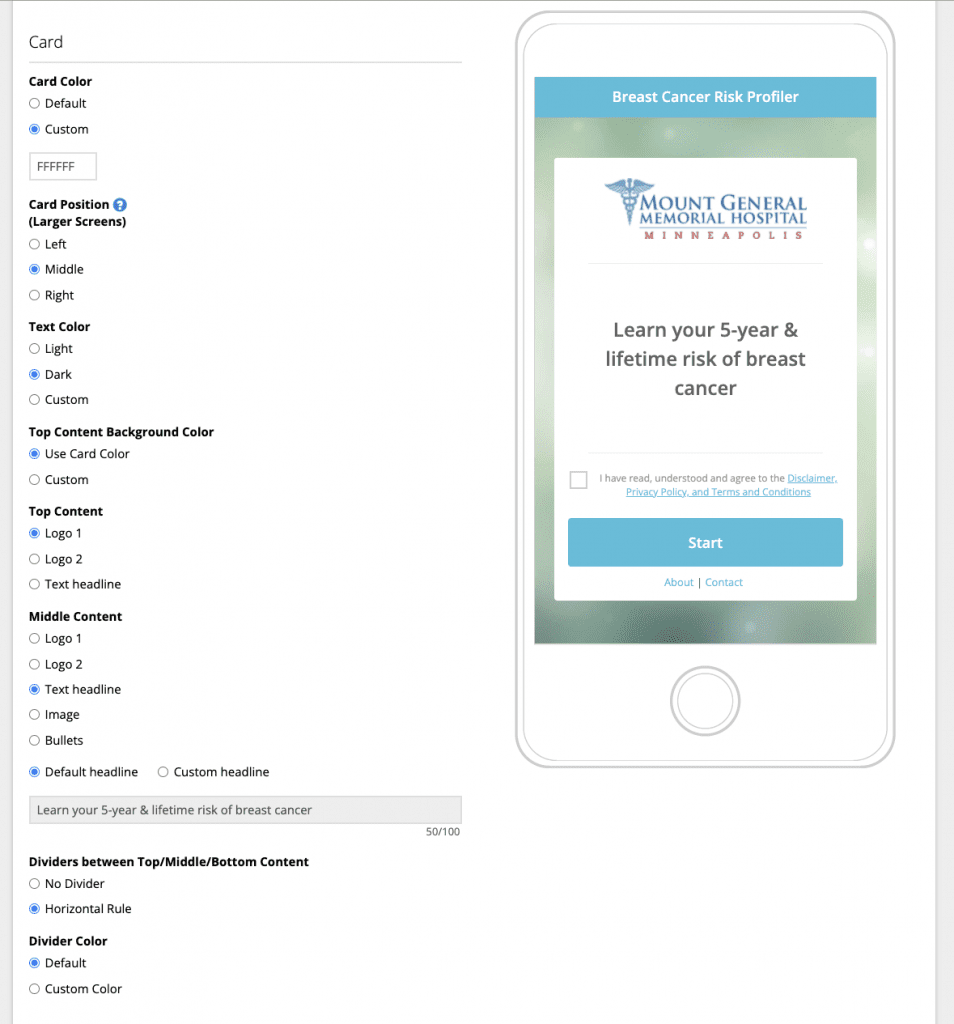
The Card area of the Splash Screen provides maximum flexibility to suit all your branding needs.
First, you can change the card color and position (middle, right or left justified on the screen).
Note: On mobile devices, the card will always appear in the middle. If you want to see how a card appears on larger screens, save your changes and click the Preview button on the main Customization page. Select Lightbox in the Preview window.
Within the card top and middle content areas, you can customize the text that appears on the card. You also have the option to use your logo or place a custom image in place of the text.
Finally, you can change the dividers that show between the content areas of the card – or remove the dividers entirely.
Buttons and Links
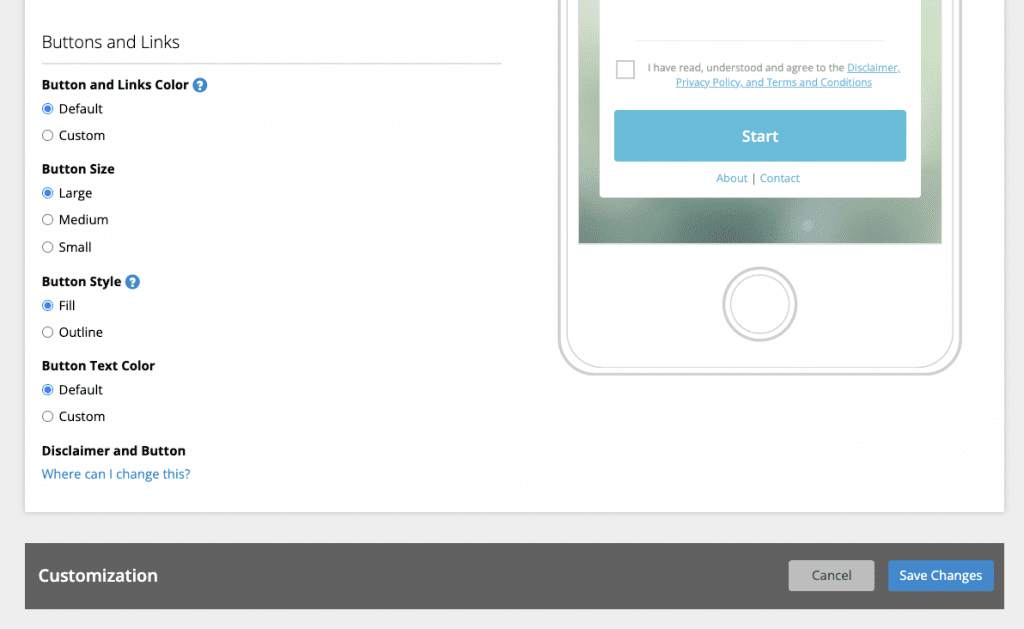
The bottom third of the card contains the Start button and links to the disclaimer, HRA references and your organization’s contact information.
In this section you can select the color of the button and links, the button size and style and the button text color.
Note: You can change the button label text and disclaimer link text on the Legal & Compliance section of Customization.
When you are finished, click the Save Changes button. Click Publish to make your changes live.
Utilizing the many options for the Splash Screen can help you create a unique look and feel to your HRAs. The possibilities to differentiate and emphasize your brand are endless.


To learn more about how you can customize your HRAs to make the highest impact, call or email your client success representative.


 Thank you for your interest.