All of your Calls To Action (CTA) content can be managed in one centralized location of the Portal, making updates and edits to all your CTAs simple to do.
A new table view displays information such as if/where your CTAs are being used. Existing CTAs are available to preview, copy, edit or delete.
Search, sort and filter the list by criteria such as Name, CTA Type or App to easily track and manage all your CTA content. CTAs provided by default can be toggled on and off in the table view. Simply select “Show” or “Hide” in the “Default CTAs” dropdown menu.
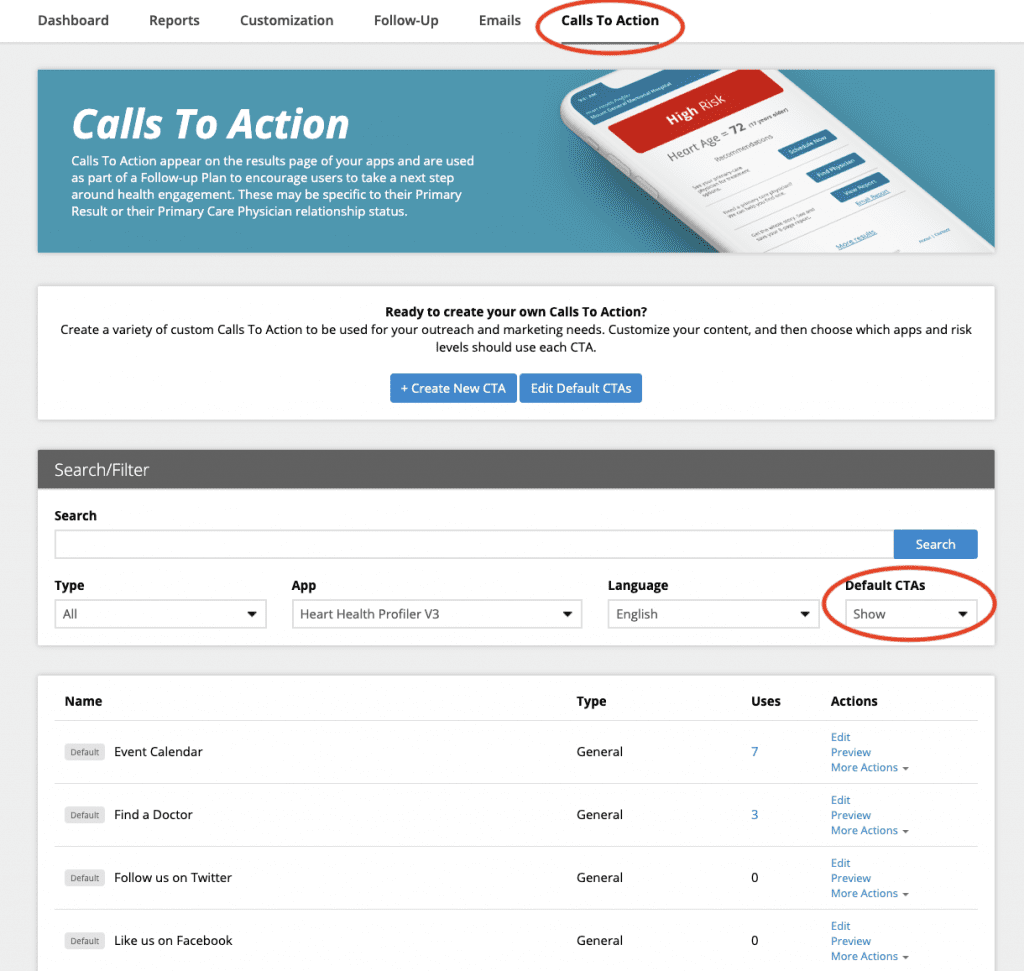
Default CTAs
Default CTAs are created the first time the Follow Up Wizard is run for your organization. If you need to edit the content of your default CTAs, you can do so at any time. Simply click the Edit Default CTAs button at the top of the page and make your edits. Note: any changes made will take immediate effect to any HRAs using the default CTAs. Individual edits can also be made by copying an existing default CTA and making changes to the duplicate.
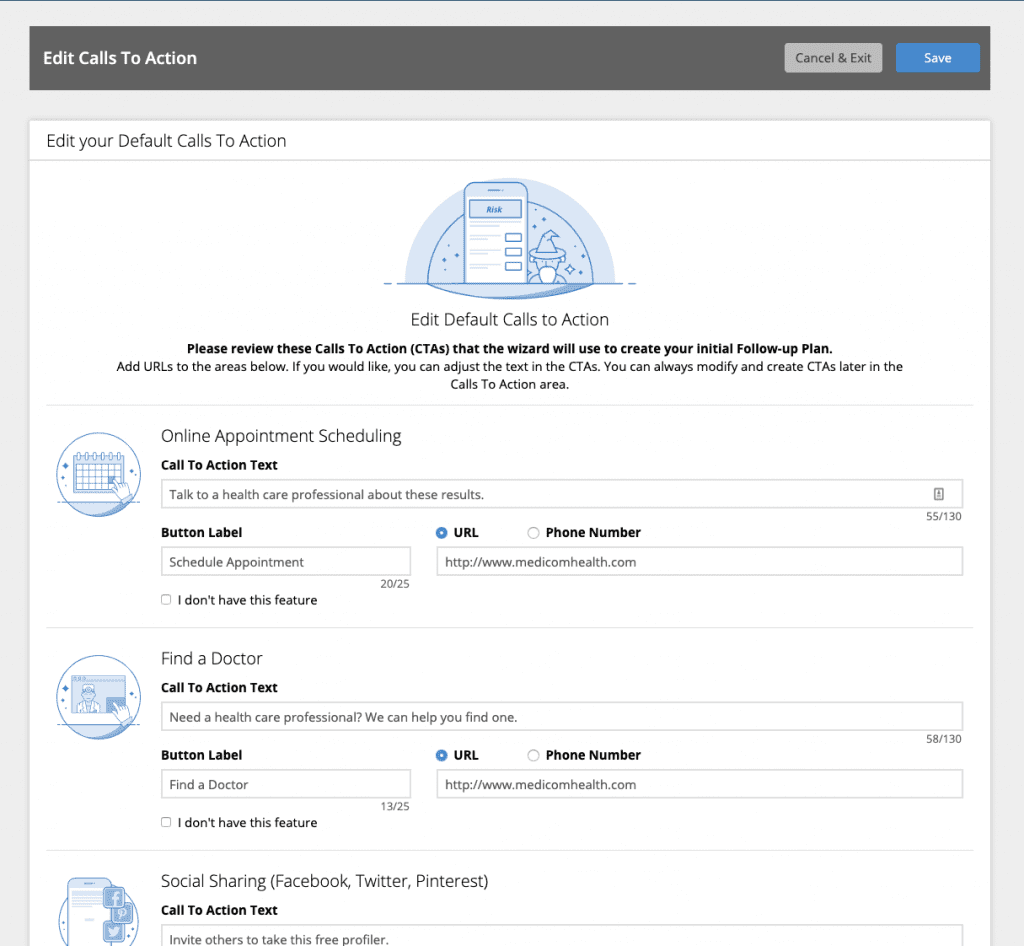
Add New Custom CTAs
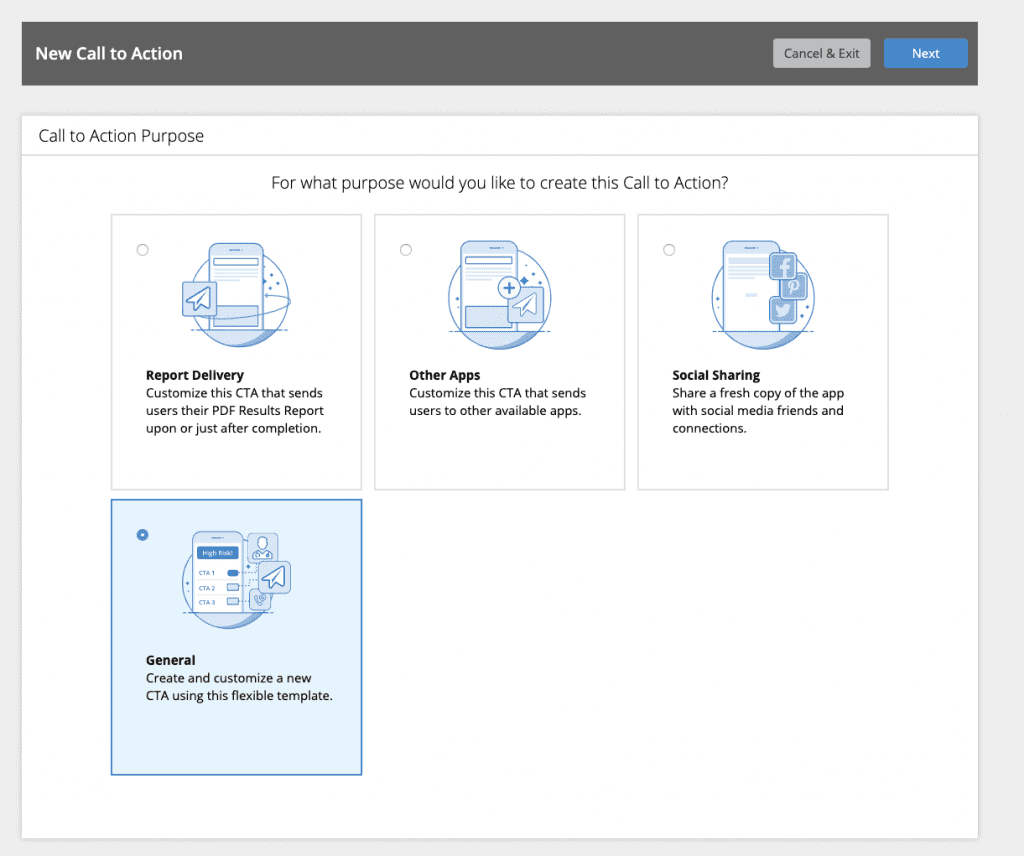
To create your own custom CTAs, click the + Create New CTA button at the top of the page. From there you will be guided through the CTA creation process.
Click which type of CTA you want to create and complete the remaining steps to add your content.
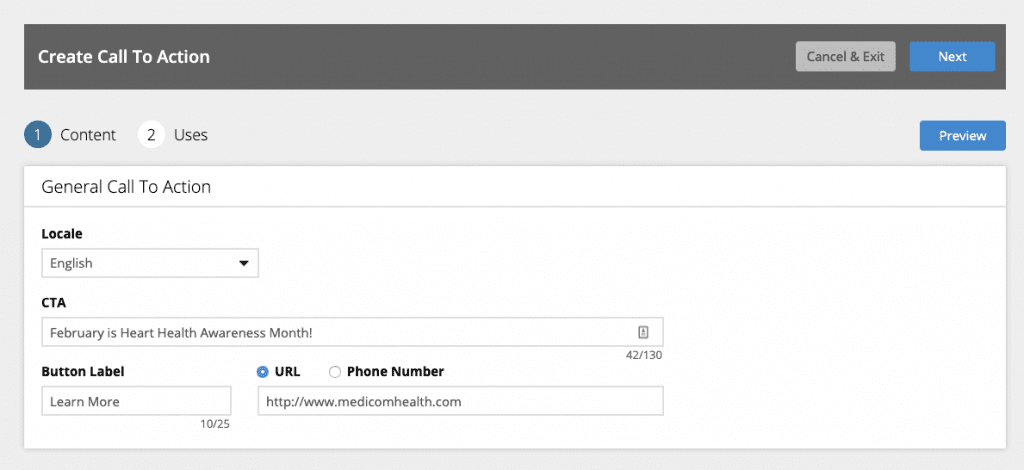
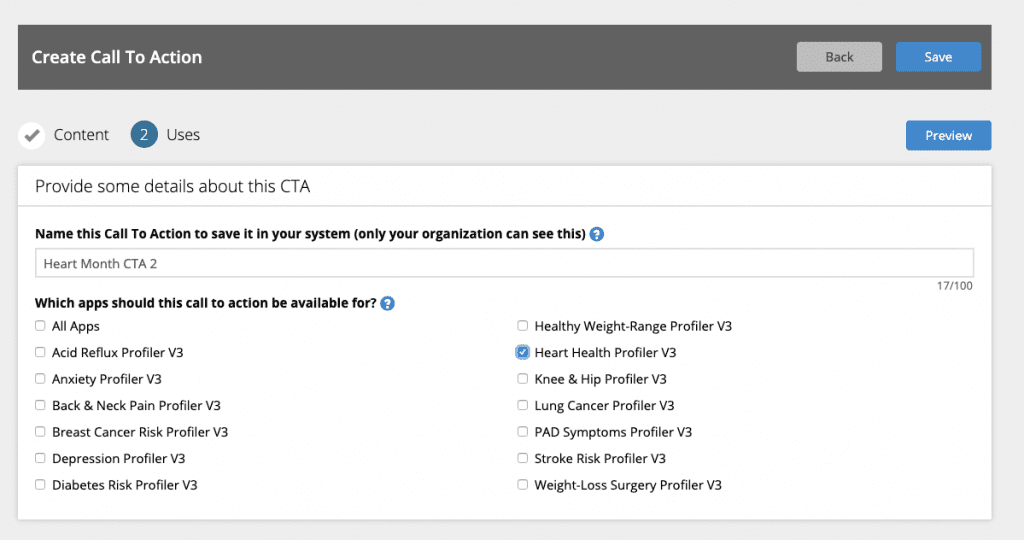
Finally, name and select where you want your CTA to be available to use. In the example below, the CTA will be used for the Heart Health HRA. Click Save to create your CTA.
After you’ve created your content, you’re ready to put your CTAs to work!


 Thank you for your interest.