In This Article
We’ll demonstrate how to make a connection between the Management Portal and Marketo.
Integrating with Marketo allows you to automatically export user contact information collected by your HRAs. This contact information, like names and email addresses, can be automatically added to the Marketo list(s) of your choosing. In order to move data between the Management Portal and Marketo, a connection needs to be set up between the two software systems.
Overview
- Set-up the integration in Marketo
- Connect to Marketo in the Management Portal
What You’ll Need
- Access to the Management Portal
- Access to the your Marketo account with admin privileges
Set-up the integration in Marketo
Information needed to make the integration
- Client Id
- Client Secret
- Marketo REST endpoint URL
Steps to gather this information
To gather this information, we first need to complete the following tasks in Marketo:
- Create an API User Role
- Create an API User
- Create Service
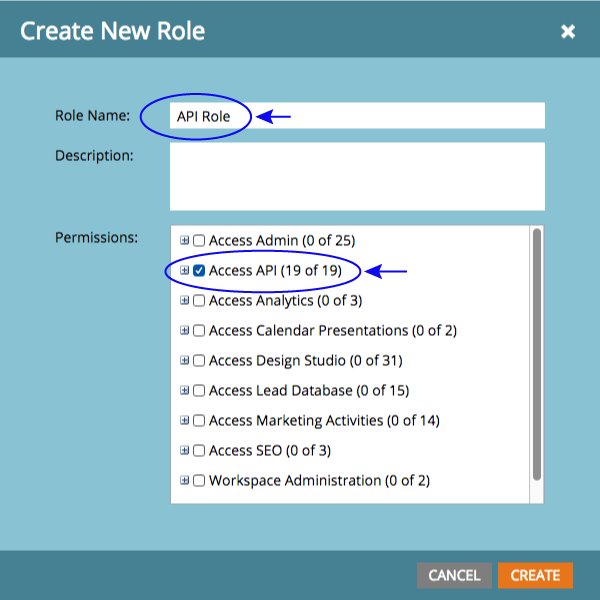
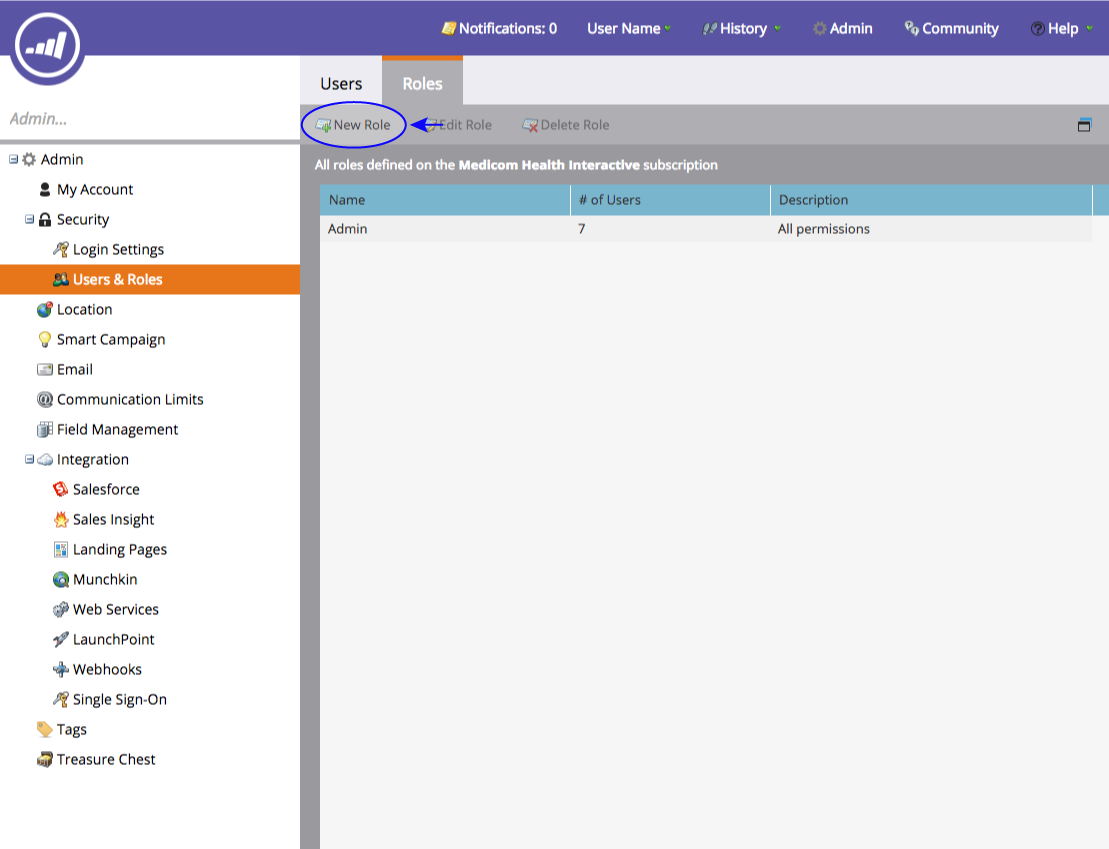
Step 1: Creating an API User Role
- Log in to your Marketo account
- Click on Admin located in the upper right navigation bar

- Click on Users & Roles from the left menu
- Select the Roles tab, then New Role

We recommend naming this API Role so you can remember it later
- Select Access API under permissions. This should be your only selection from the permissions menu
- After making these selections, click Create
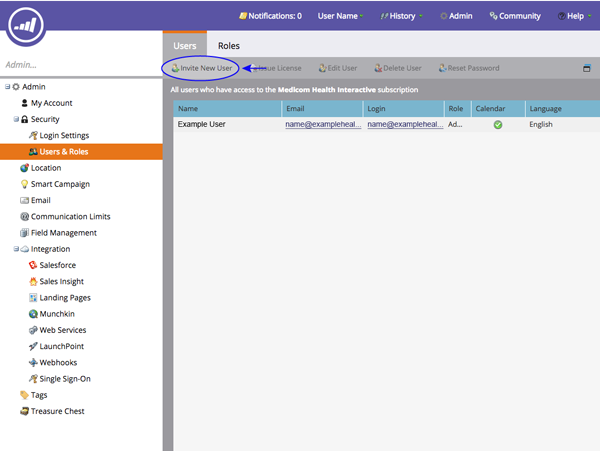
Step 2: Creating an API User and assigning them the API Role
- Stay on the Users & Roles page, and click on the Users Tab
- Click on Invite New User
- Select the Roles tab, then New Role
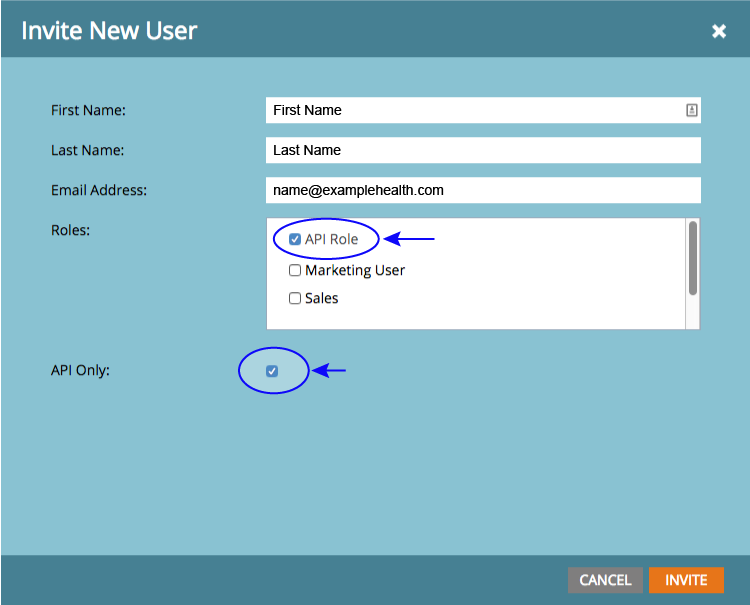
- Enter a First Name, Last Name, and Email Address. We suggest you use your own name and email but this choice is less important as email verification is not required.
- From the roles menu, select the API Role you created earlier
- Check the API Only option
- After making these selections, click Invite
Step 3: Creating a Service
This last step will generate the codes we need to connect to the Management Portal system.
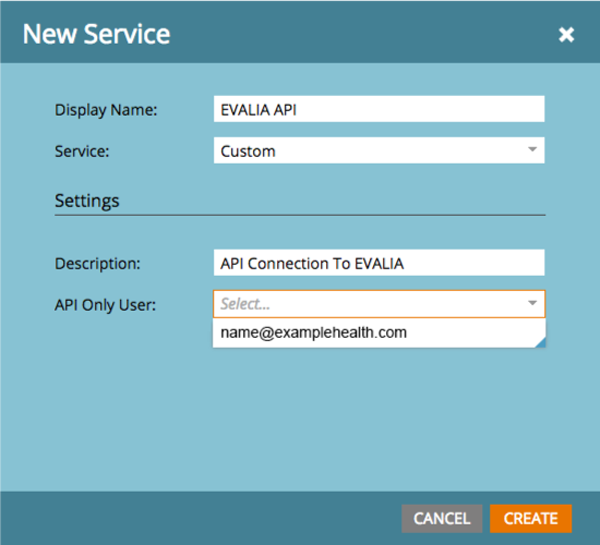
- From the left menu, select the LaunchPoint page, then New > New Service
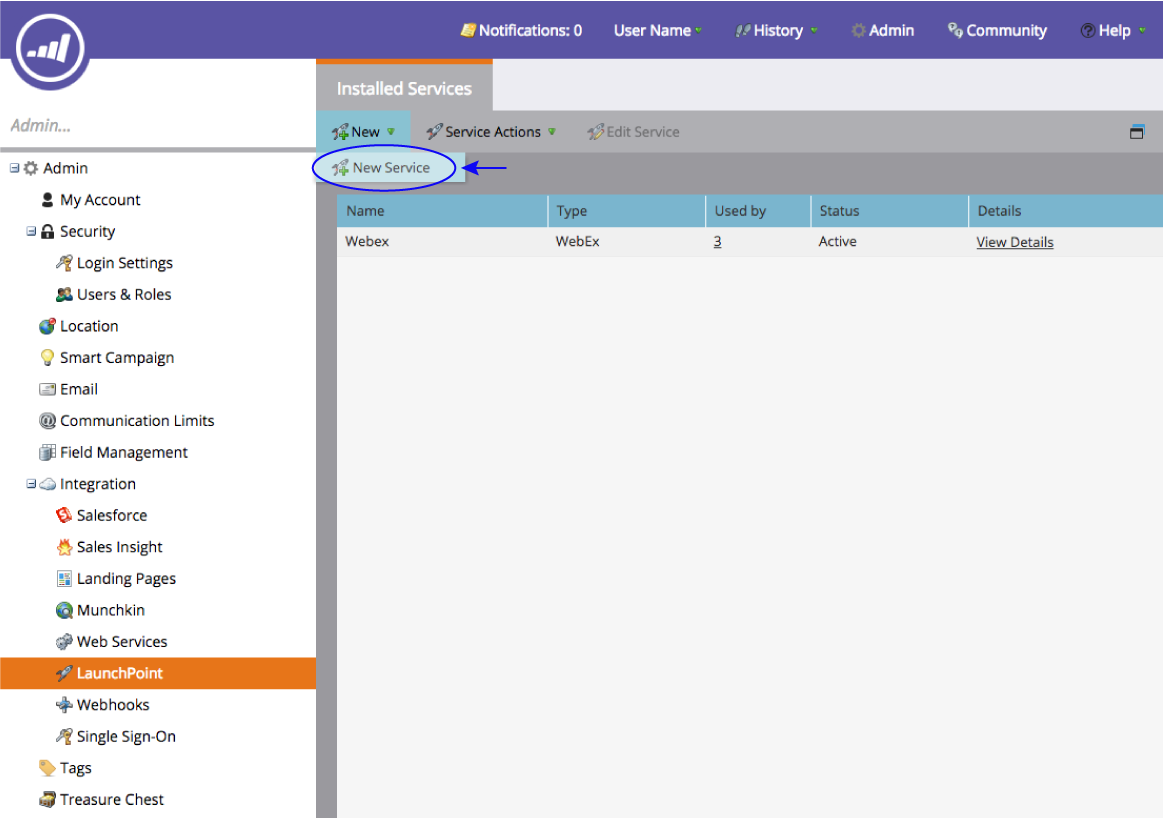
- Enter a Display Name – something you’ll remember, like “EVALIA API”
- Select Custom from the service menu
- Enter a Description – again, something you’ll remember
- Select the API Only User – this is the user you created earlier
- After making these selections, click Create
Connecting to Marketo in the Management Portal
By completing the steps listed above, we’ve now successfully generated the codes we need to connect to the Management Portal system. Now let’s find this information and enter it into the integrations section of the Management Portal.
Finding and applying the Client Id and Client Secret
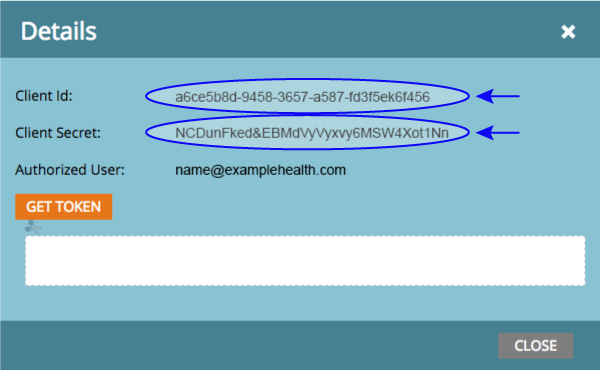
- Stay on the LaunchPoint page and locate the Service you created earlier listed on the table
- Click View Details

- Listed here are the Client ID and Client Secret
- Now shift over to the Management Portal
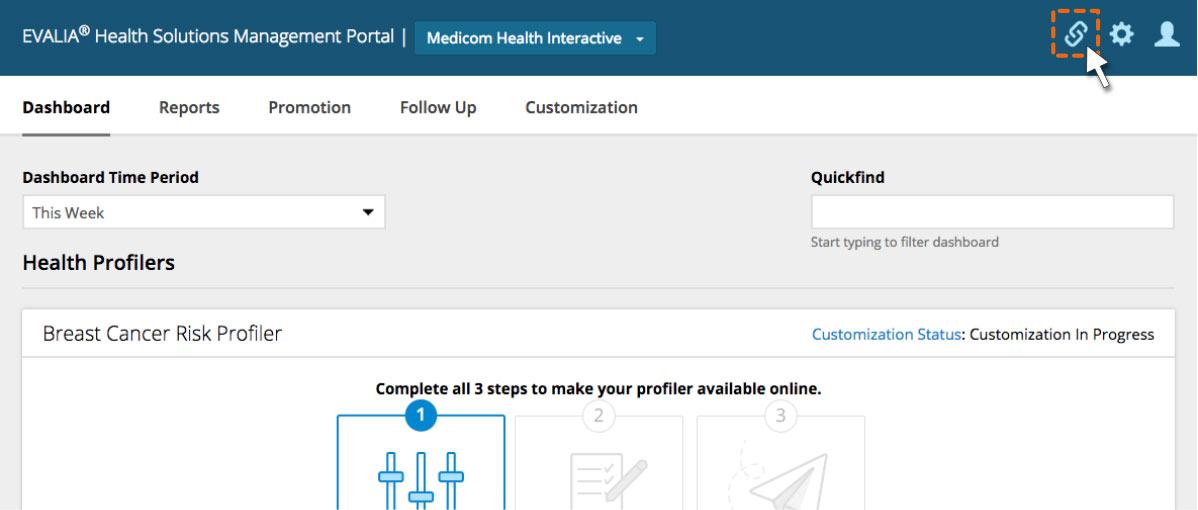
- Select the Integrations icon (link) from the top right corner of the menu.
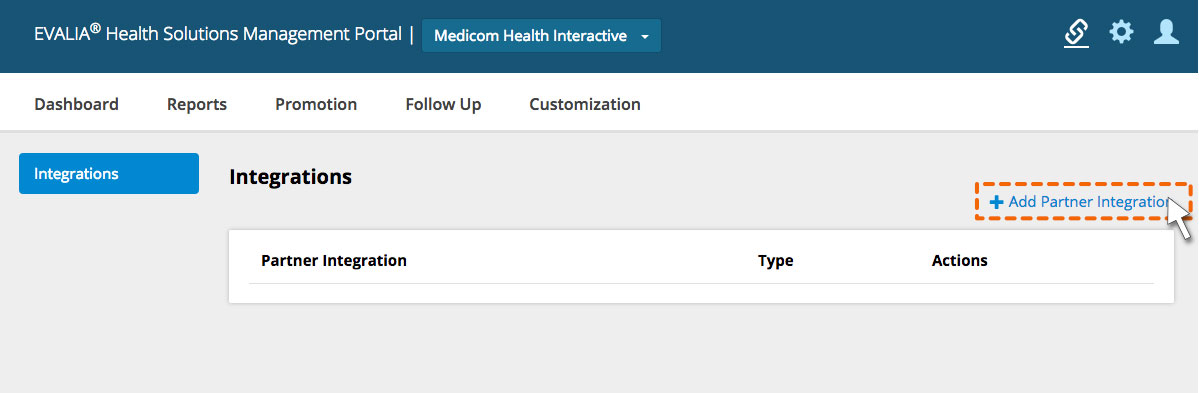
- Click Add Partner Integration
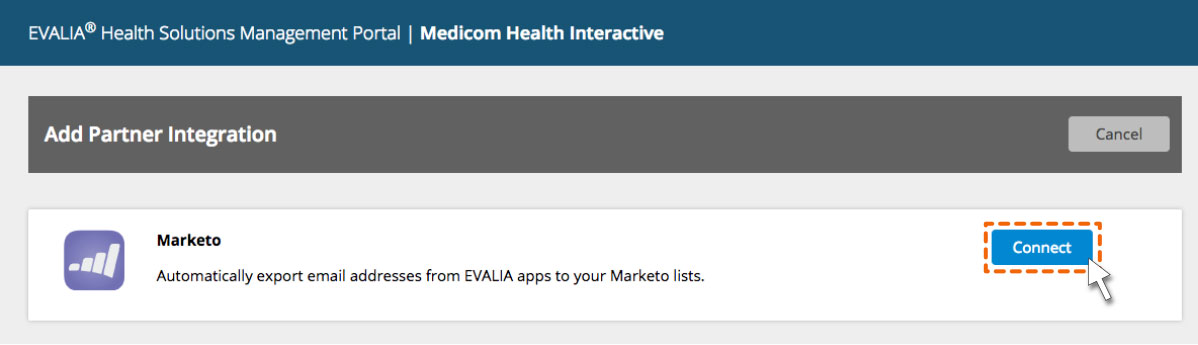
- From the Add Partner Integration page, locate the Marketo section and click Connect
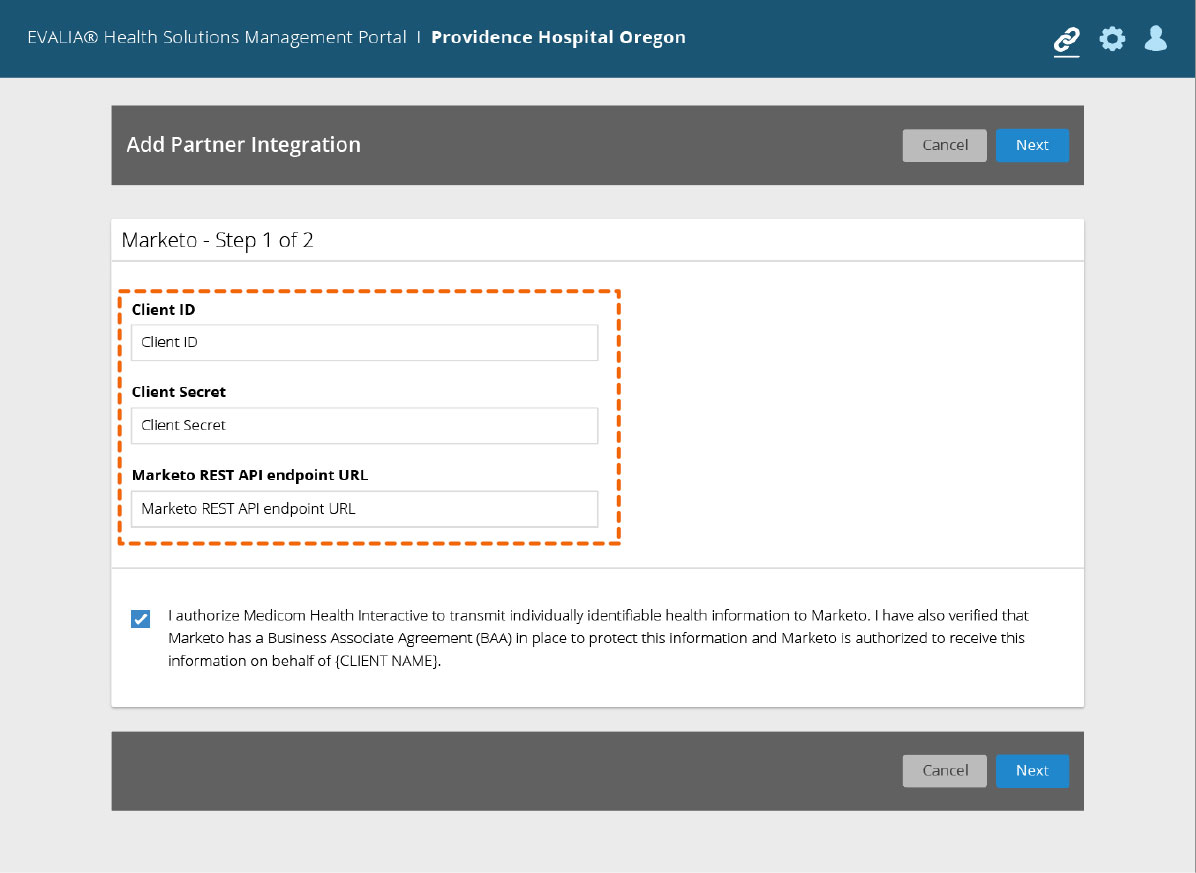
Step 1: Add the required information to connect Marketo. This includes your Marketo Client ID, Client Secret, and the Marketo REST API endpoint URL. When you’re finished, click Next.
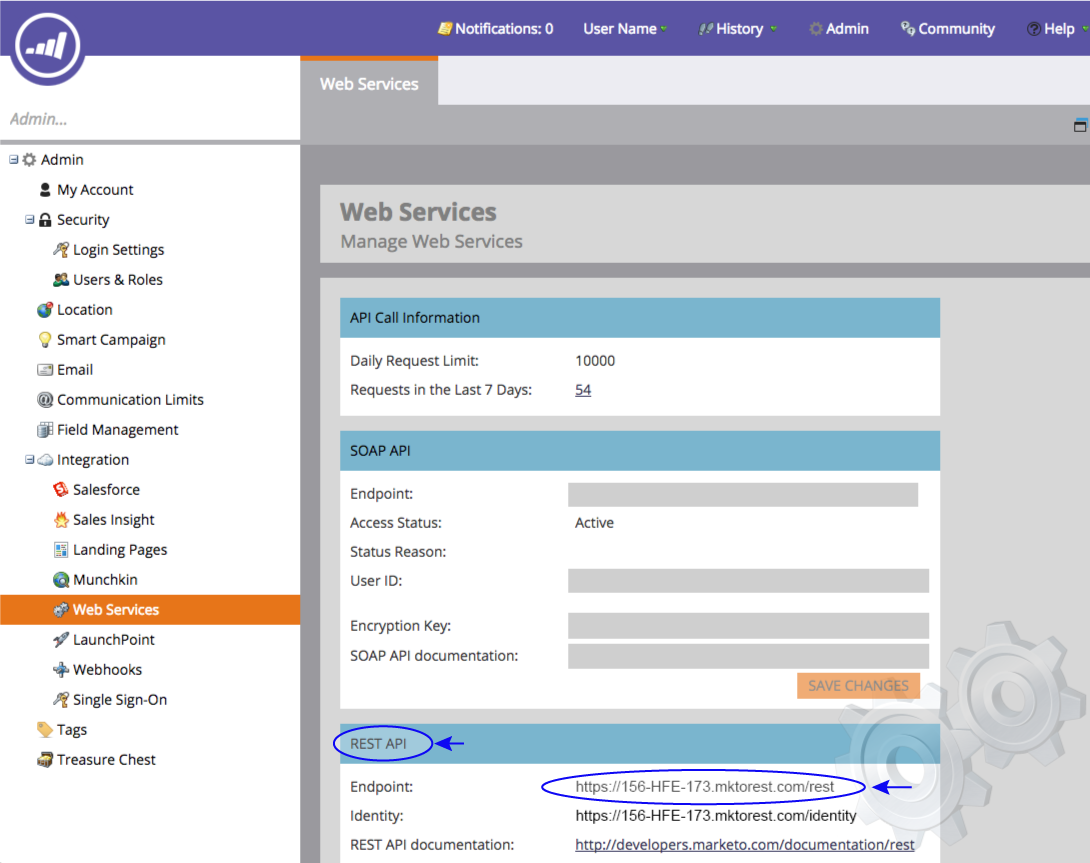
Finding and applying the REST endpoint URL
- Click on Web Service from the left menu
- Scroll down to the REST API section, here you will find Endpoint URL
- Now shift over to the EVALIA Management Portal
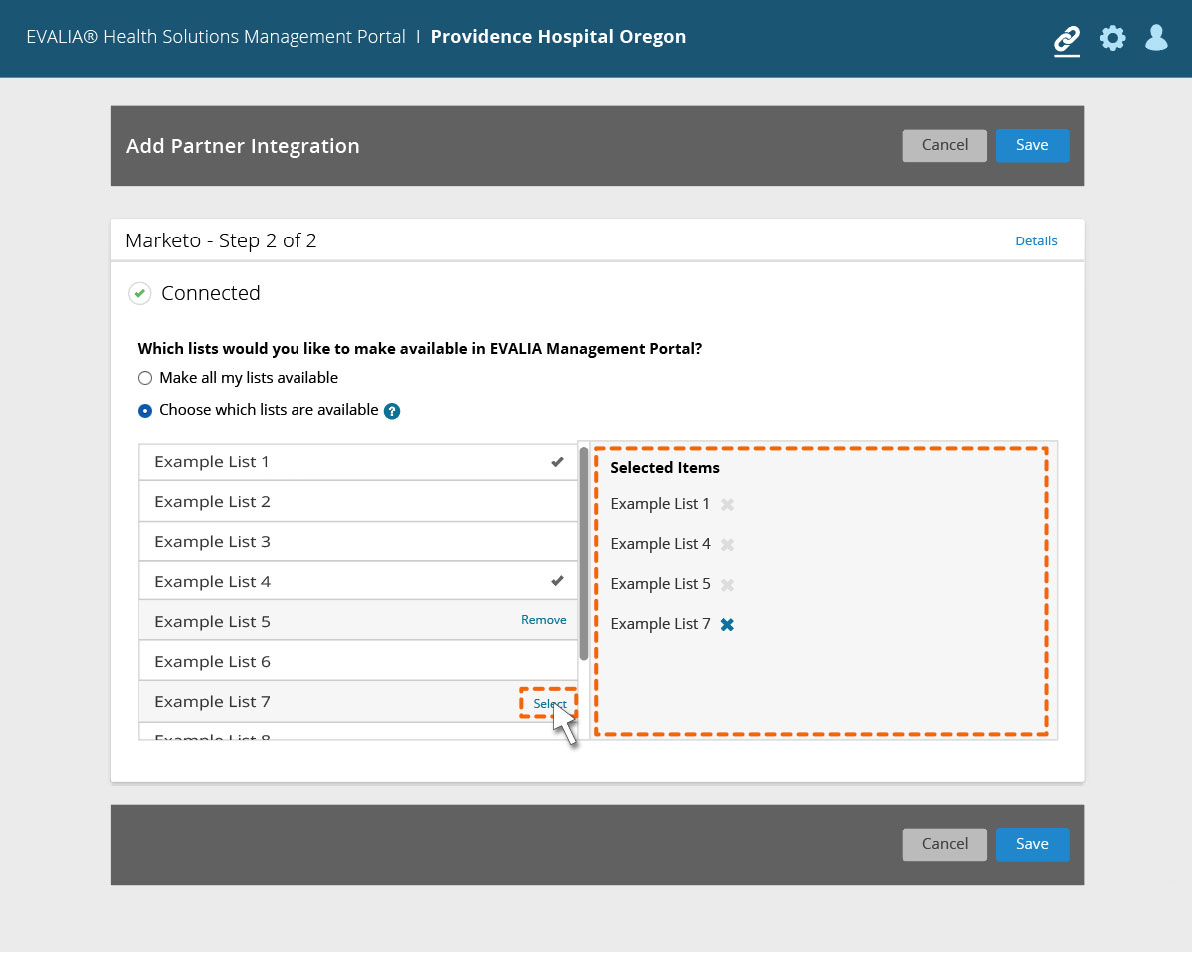
Step 2: You have the option to make all of your lists available, or to hand-select the lists you’d like to make available. If you want to choose the lists that will be made available, your selections will be in the Management Portal. Click Save when you’re finished.
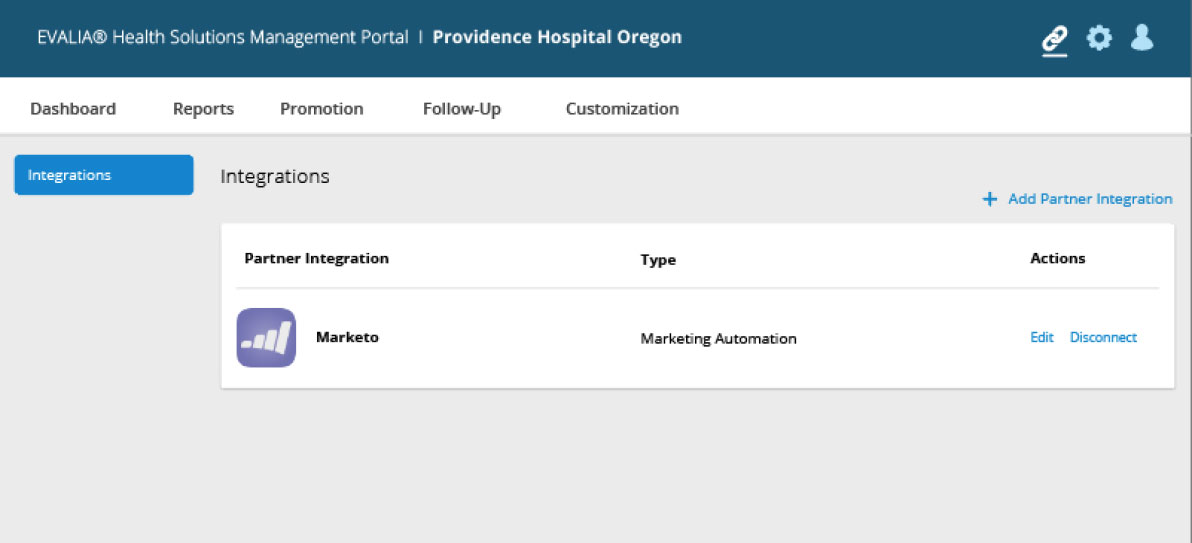
Now that your Marketo connection is set up, you can configure a data export for one or multiple apps:
Customize Data Export to Marketo
Custom Fields for Marketo Integration


 Thank you for your interest.