Once you’ve run the Follow-Up Wizard, your default Follow-Up plan is created and ready to publish. If at any point you want to view or edit your plan’s configuration, simply click into the tile corresponding to the part of the plan you’d like to manage.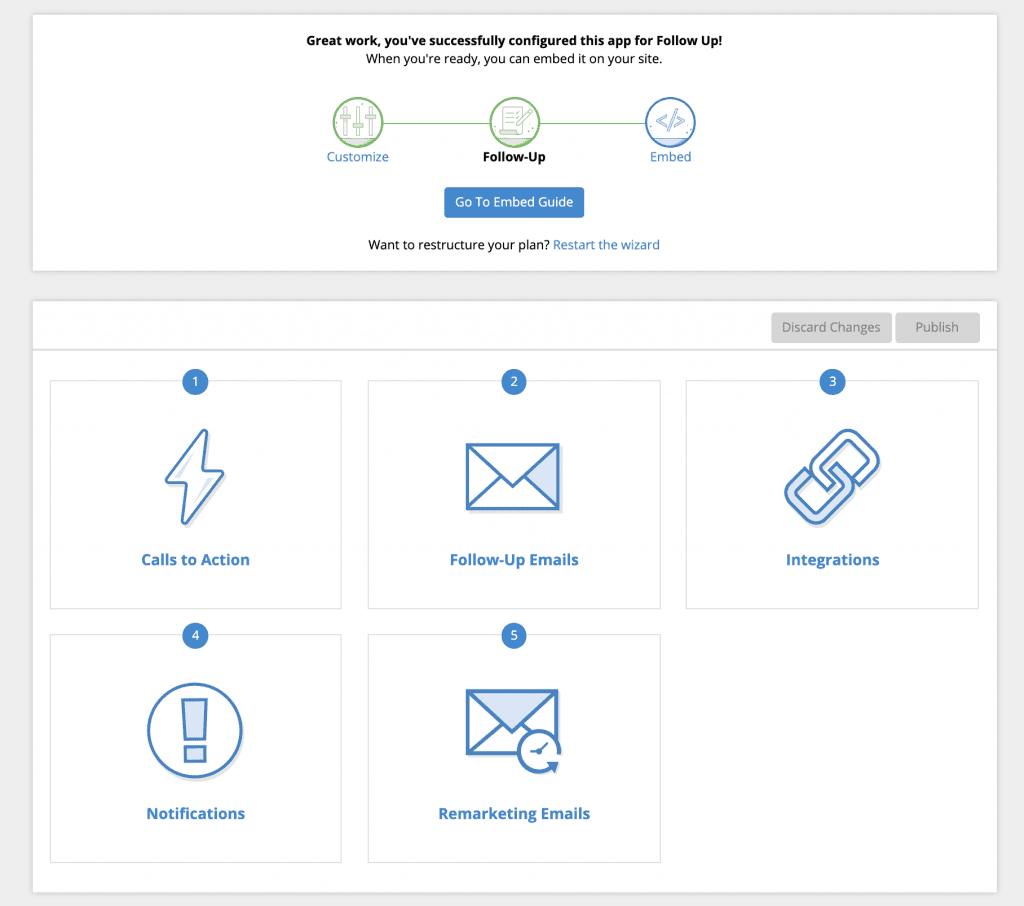 Clicking the Calls to Action tile will open the Calls To Action Mapping matrix.
Calls to Action Mapping
Call To Action (CTA) sets for your app are customizable within the Mapping matrix. Sets are divided up between Primary Result and Primary Care Physician status. This can create many sets, such as for those who want a different set of CTAs for every Primary Result and every Primary Care Physician status. You can also create one single set of CTAs that apply to all users regardless of Primary Results and Primary Care Physician status. To change your matrix, simply rerun the Follow-Up Wizard and choose a different configuration.
Primary Results are listed in the left column of the matrix. Primary Care Physician status is listed across the top row of the matrix.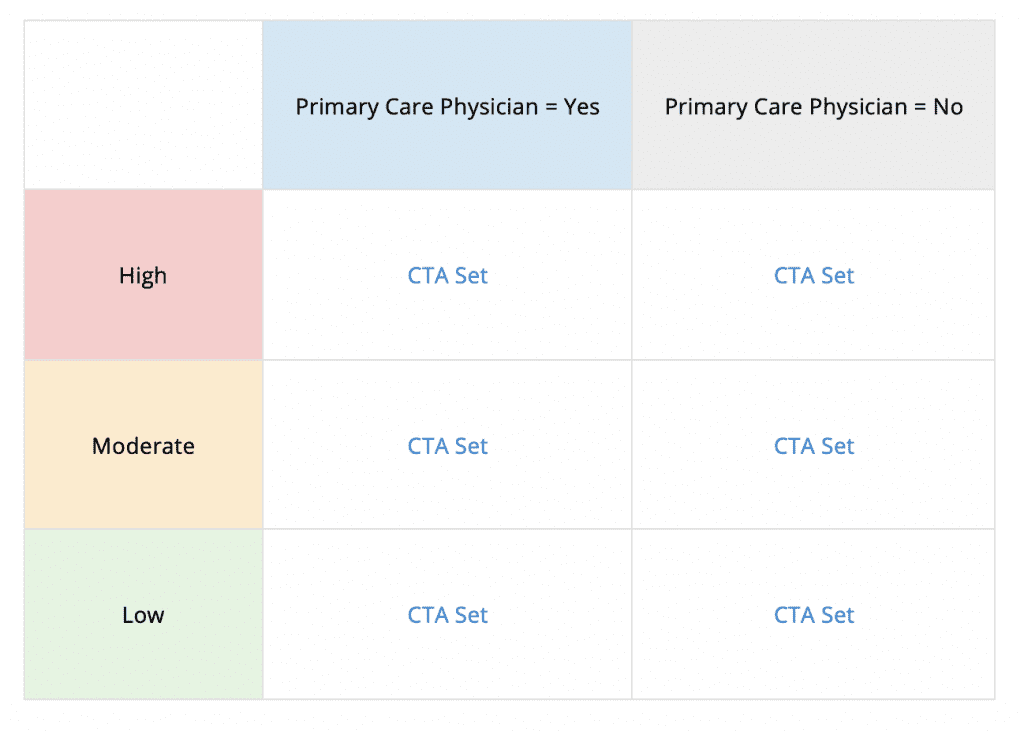
How To Customize/Reorder CTAs Within Sets
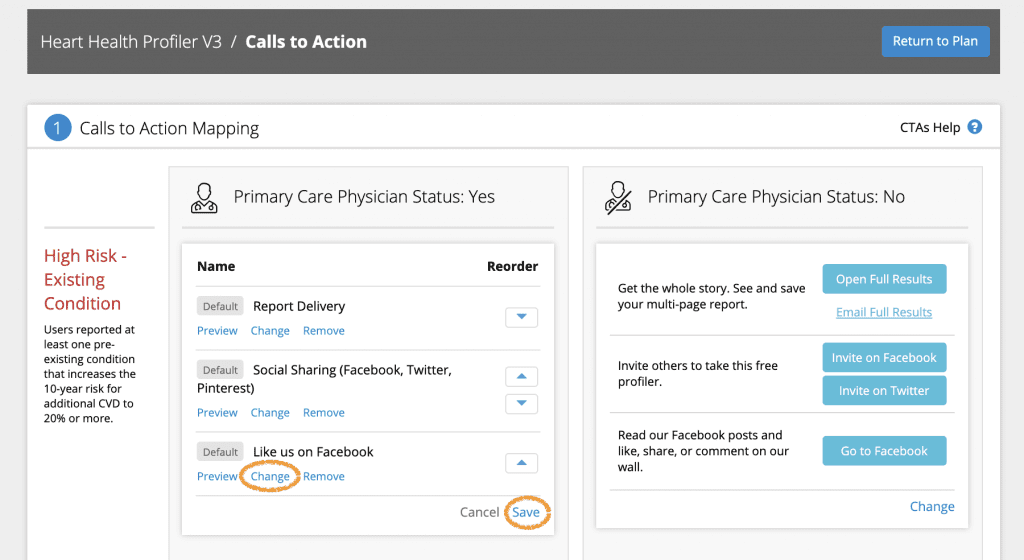
Select which CTA set you’d like to customize. Navigate to the lower right corner and click Change.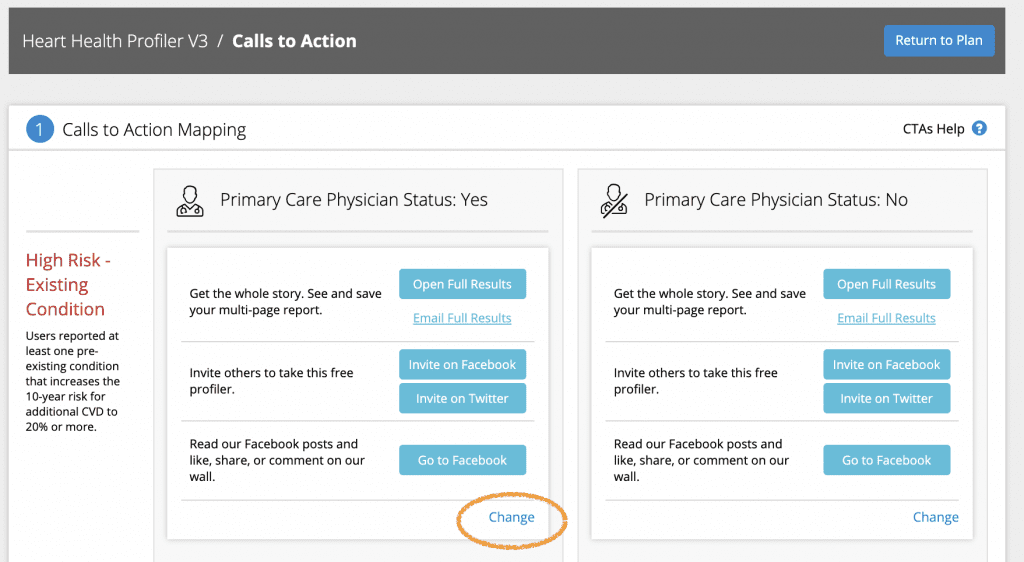 For the CTA(s) you want to change, click the Change link under that CTA and a selection modal window will appear with all available CTAs for the set. (CTA content and availability is configured within the CTA section of Portal).
To reorder your CTAs, click the up or down arrows next to each CTA.
When you’ve finished customizing your CTA set, navigate again to the bottom right corner and click Save.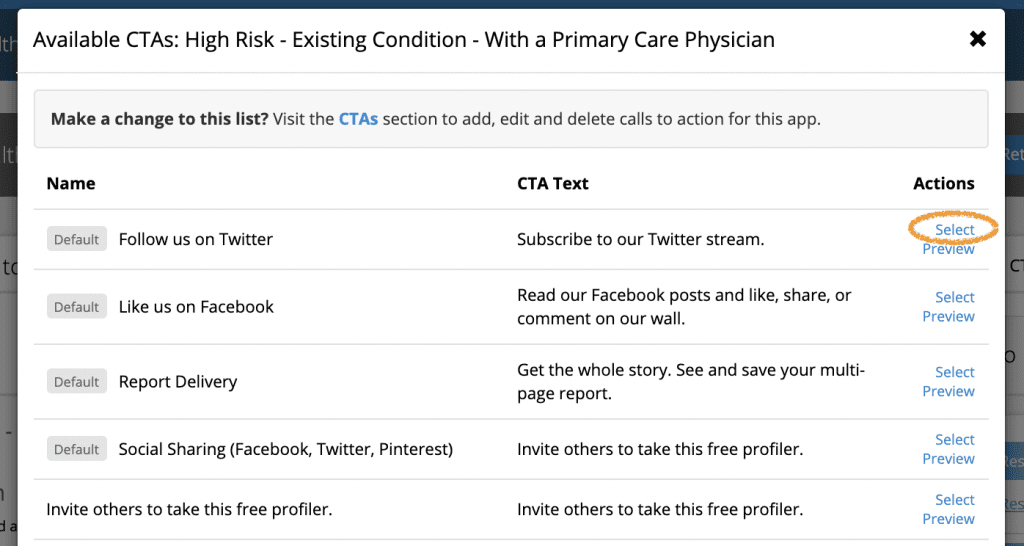
 How To Remove CTAs Within Sets
Select which CTA set you’d like to customize. Navigate to the lower right corner and click Change. Next, keeping in mind that you must retain at least one CTA per set at all times, locate which CTA(s) you’d like to remove and click the Remove link under that CTA.
You may add more CTAs (up to 3) to a set by clicking the +Add CTA link and selecting a CTA from the selection modal window.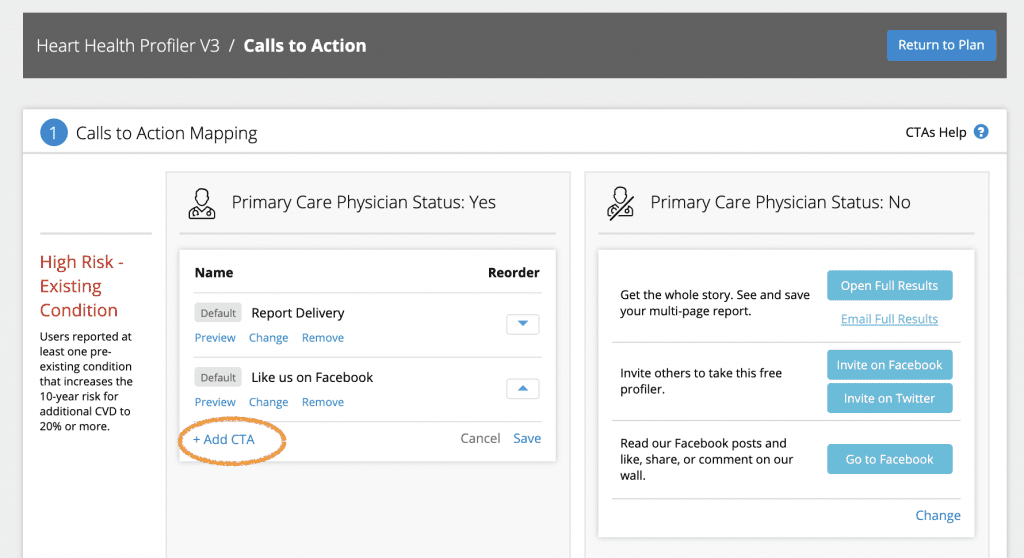
When you’ve finished customizing your CTA set, navigate again to the bottom right corner and click Save.
Click Return to Plan button when finished. Click Publish button to make your changes live.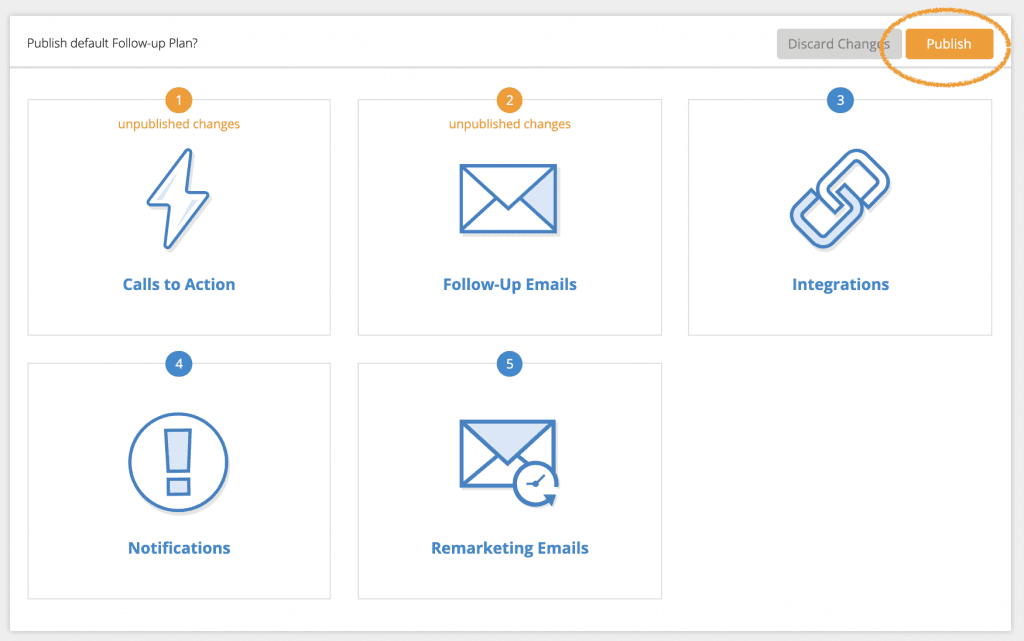
Learn how to manage CTA content and availability
Learn how to map and schedule Follow-Up Emails
Learn how to manage Follow-Up Email content and availability


 Thank you for your interest.